Trezor Wallet Guide (Cold Storage)
Wallet Provider: SatoshiLabs
Official Website: https://trezor.io/
Compatible Operating Systems: Windows (version 10 or newer), MacOS (version 10.11 and higher), Linux. On mobile devices, Android is supported.
Description: Trezor is a hardware wallet providing advanced security for handling cryptocurrencies offline. Trezor, a small single-purpose computer, makes secure payments without exposing your private keys to a potentially compromised computer. To do this, Trezor keeps the private keys away from the Internet and confirms the transactions in-device.
Trezor devices are interacted with via the Trezor Suite browser interface which is incredibly easy to use for new and existing users of cryptocurrency. This new interface was introduced at the end of January 2022.
PLEASE ENSURE YOU ONLY PURCHASE TREZOR DEVICES FROM THE OFFICIAL WEBSITE.
Supported Crypto Assets: Trezor supports a wide variety of cryptocurrencies and user tokens, and the list has been growing on a regular basis. There are more than 1500+ different coins and tokens supported by Trezor.
View the official list of Trezor supported crypto assets by clicking here.
Please make sure you do not send any other cryptocurrencies that are not included in the official list to Trezor Wallet addresses; those funds will not be accessible if you do.
Step 1: Download Trezor Suite
Download Trezor Suite from the official website: https://suite.trezor.io/start/
This program allows you to interact with and access any of the Trezor products: Trezor Model T, Trezor One.
Once downloaded, start and install Trezor Suite. The following should pop up on your screen.
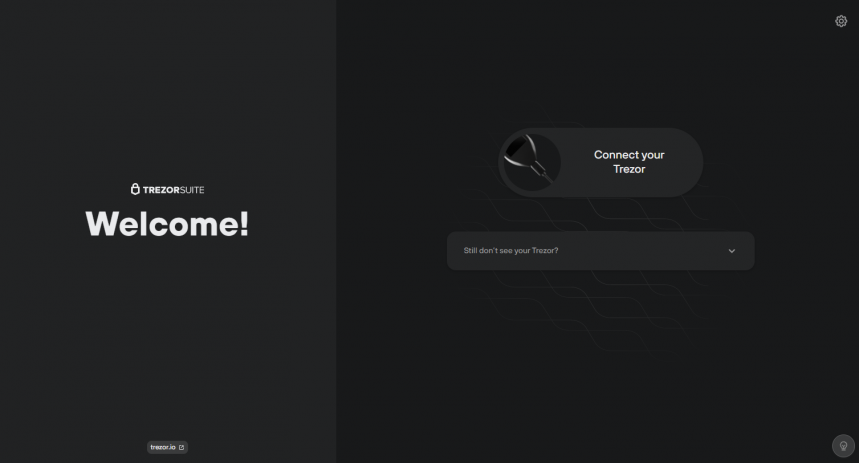
Step 2: Connect Trezor wallet to your computer and click the Begin setup button
Before clicking on Setup Trezor you should check that the packaging is intact and that the holographic seal is not tampered with.
Connect TREZOR wallet to your computer using the USB cable provided. On your TREZOR wallet’s screen, you should then see a Lock icon, and an instruction asking you to go to trezor.io/start.
Please make sure that the device is properly connected.
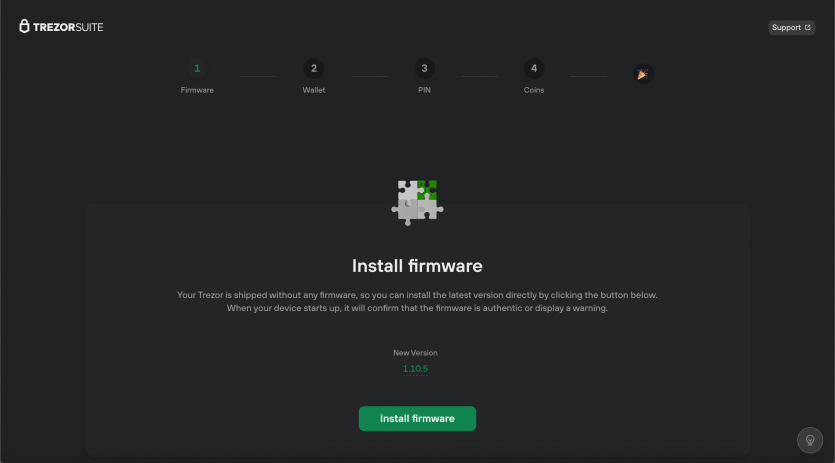
Step 3: Install latest Firmware
Since Trezor is shipped without firmware, the first step is to install the latest version simply by clicking the “Install Firmware” button.
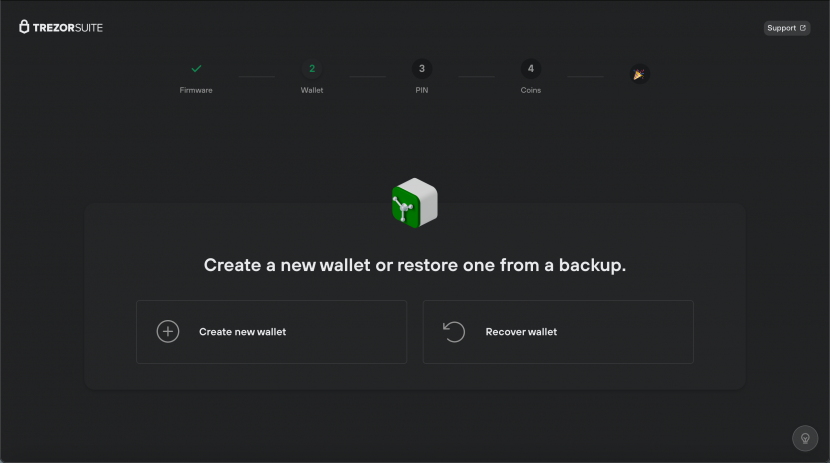
Step 4: Create a new wallet, write down recovery seed phrase (Keep this safe)
To generate a new wallet, click on "Create new wallet" and follow the instructions on your device. Your device will generate a new and unique seed which will hold all of your accounts and addresses.
After selecting “Create new wallet” you will then be prompted to choose the default Standard seed backup recovery process. The next step involves creating the backup, recording your Recovery Seed phrase on the Recovery Seed Card provided. To begin the process, simply click "Create backup".

Trezor will then generate a list of words.
Write down the words displayed on the Recovery Sheet, being careful not to make any mistakes. Repeat the process until all 24 words are written down.
The Recovery Passphrase is displayed on the device screen. Write down the words displayed on the Recovery Sheet, being careful not to make any mistakes. Repeat the process until all 24 words are written down.
It is strongly recommended to keep more than 1 backup of your Recovery Passphrase.
In case your Trezor is lost or stolen you can easily retrieve your funds another Trezor or any other compatible wallet.
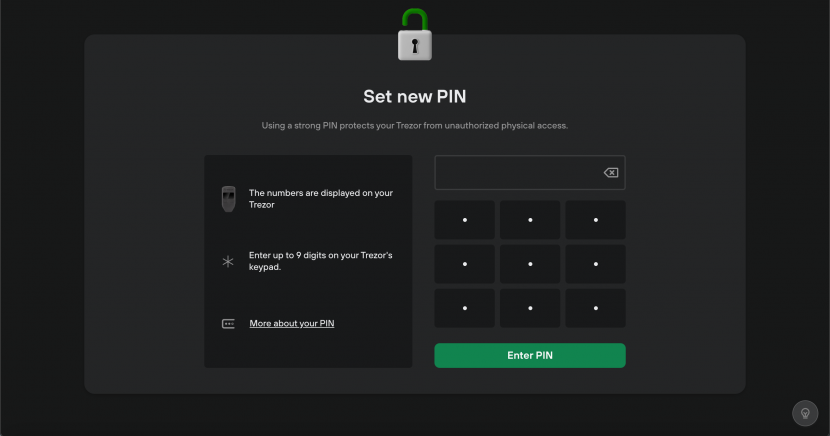
Step 5: Setting up the PIN
In the "Set new PIN" window, you’ll see the blind matrix keypad on the right-hand side. By referring to the numbers displayed on the screen of your device, simply use your mouse cursor to select the corresponding digits in the 3x3 matrix to set your new PIN.
We recommend you choose Standard wallet as the initial and default wallet.
Step 6: Access your wallets
Your Trezor Suite should be ready to be used. You should now see the home screen with a Dashboard and your Portfolio.
To receive a payment, select an account and click on the Receive tab. The receiving address should be verified on your Trezor device by clicking on Show full address. After verification, copy the receiving address and share it to receive your funds.
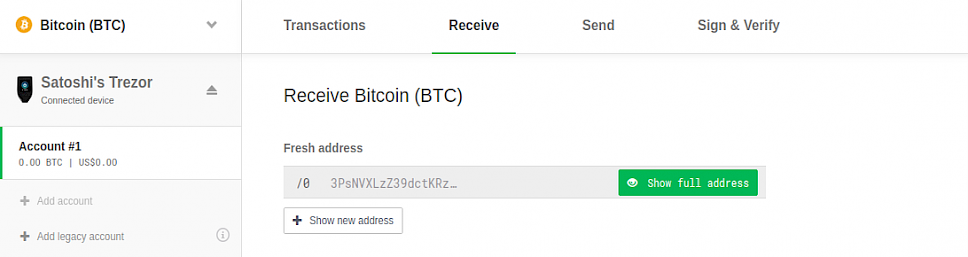
The wallet address will be displayed on screen and will appear on the Trezor device.
Copy your Wallet Address by clicking the Copy feature. This is your Trezor devices Wallet Address used to receive Crypto Assets.
Make sure you only send compatible assets to the wallet. It is always best to double-check the Wallet Address before sending coins.
Step 7: Send a Crypto Asset To Trezor Device
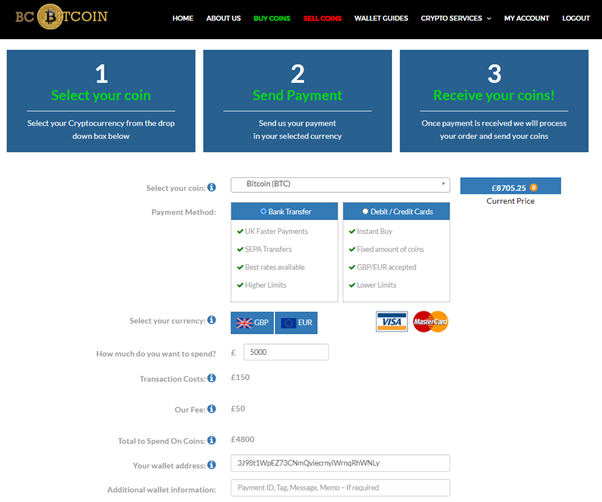
You can Buy and Sell all coins compatible with Trezor through BC Bitcoin.
- Select a Cryptocurrency to purchase and enter the amount to spend.
- Within the Your Wallet Address field, enter your wallet address (Any additional Info).
- Complete the order and payment, coins will be sent to your provided wallet.
Make sure you double-check your order and wallet information before submitting the order.
We check all wallet addresses are valid on the blockchain before sending coins. If you are still unsure, please contact us and we will assist you.
Trezor Wallets Overview
Pros:
- Verified by its track record over the last five years on the market
- Cold Storage wallet disconnected from the internet.
- Supports more than 1500+ coins and tokens.
- High level of security for device and user.
- Well known and highly trusted company and brand.
- Affordable for all budgets and preferences.
Cons:
- Requires a computer and a small amount of technical knowledge.
- Not all Crypto Assets are supported by Trezos.
- Recovery information is the only way to regain access.
Thank you for using our wallet guide. Please check out our other content, news articles and social media below. If you have any questions, please contact info@bcbitcoin.com and our team will be pleased to help you.
Trezor Resources:
BC Bitcoin Resources:
Articles: https://www.bcbitcoin.com/articles/
Twitter: https://twitter.com/bc_bitcoin
Buy Coins: https://www.bcbitcoin.com/buy/
Coin Guides: https://www.bcbitcoin.com/crypto-services/coin-guide/
Disclaimer: The information provided in this article is intended for informational purposes only. It is the readers responsibility to complete their own research and due diligence.